Showing posts with label Xpress it Tape. Show all posts

Wednesday, 13 November 2019

2 Simple Christmas Cards - CraftOnline Creative Team


I decided to make some simple cards in preparation for Christmas, so I ordered some supplies that would work for this and be great to add to my December Daily Journal stash as it is that time of year where I prepare for all things December.


Items used in this project:
Poppy Crafts A4 Carstock Pack Forever Green
Poppy Crafts A4 Cardstock Pack Pink
Poppy Crafts 6x6 Paper Pad Starry Night
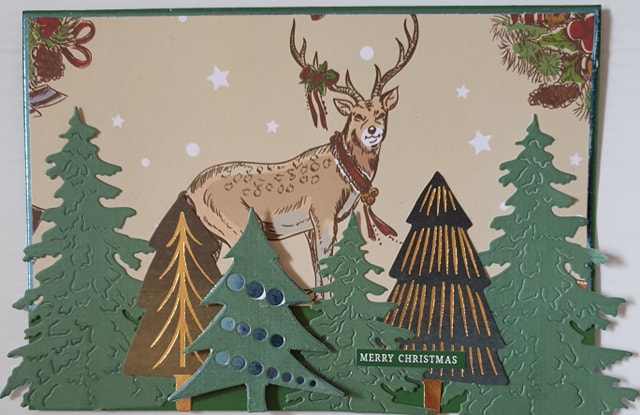
Poppy Crafts Christmas Treats Die Set
Poppy Crafts 3 Pine Trees Die Set
Poppy Crafts A5 Paper Pad Nordic Christmas
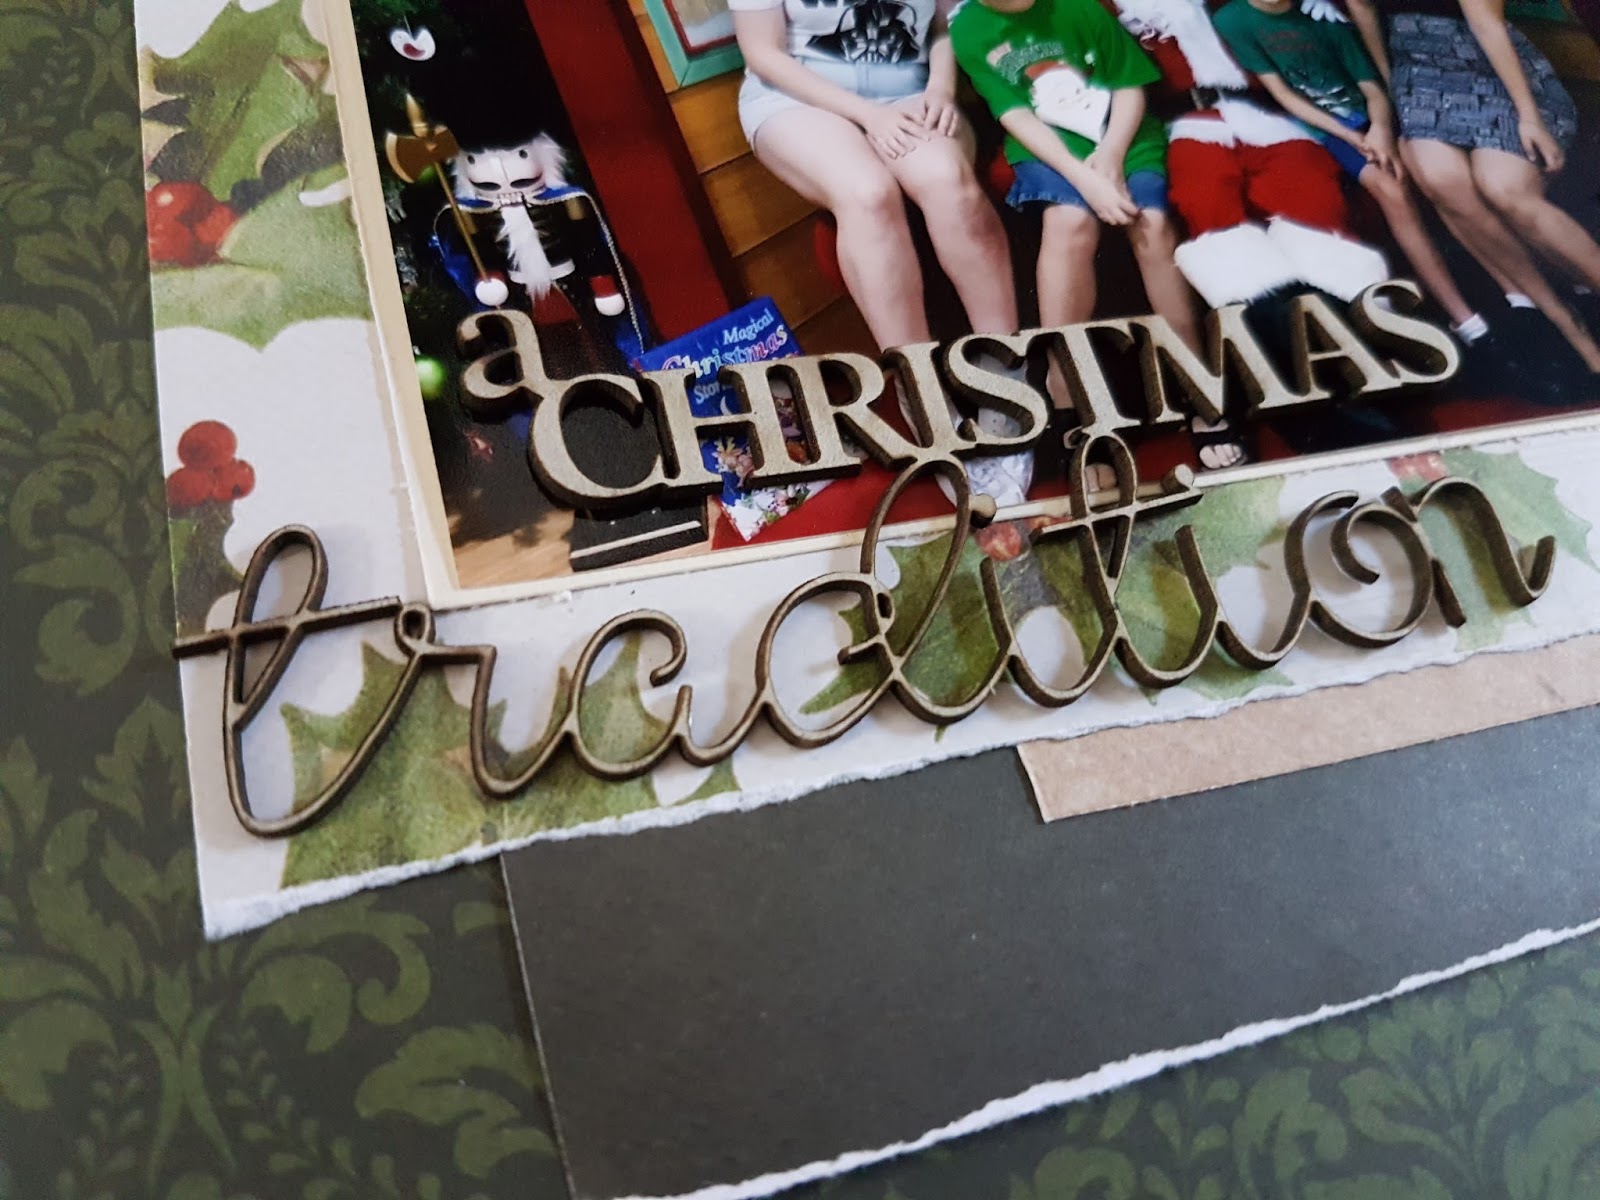
Pink Paislee Together For Christmas Ephemera
Carta Bella Merry Christmas 12x12 Sticker Sheet
Xpress It Foam Tape
Helmar Acid Free Glue
And I should have used Universal Crafts Fine Tip Applicator Bottles to prevent mess, they were sitting next to me but I forgot to use them.

You can view my Process Video by clicking on the pic or video below.

https://www.youtube.com/watch?v=mzFtJJ-XAq8&feature=youtu.be


I love the shimmer of the blue baubles on my tree and behind my paper.


I love how these papers worked so well with the Pink Paislee Together For Christmas Ephembera.


So if you need to get some quick cards made make sure you check out my video to see how these came together.

Monday, 7 October 2019

I Love Dance - Ruby Rock-It Creative Team

When I saw the gorgeous new Bella Mini Theme called Dance Queen I just had to scrap photos of my Granddaughter's first dance lesson so I decided to make a a TN kit from DQN69 Fusion and DQN83 On Pointe adding some lace from my stash. 
I decided to keep DQN76 Pose as a full sheet so I can use it with the left overs from this project to do a 12x12 layout for Miss E's album later.

I selectively cut words and cards from DQN69 Fusion to start my little travel kit and then I cut DQN83 On Pointe down to 2 pieces measuring 4 1/4 x 8 1/4 as I thought I might want to do a double page in my TN with the adorable photos I have.
I also added the 8 1/4 long scrap from doing this and a piece of Fusion that I didn't want the cards from to use the back side of both of these as layers as they are just gorgeous.


Now that I had everything ready to go I worked out photo placement on my 2 pages and trimmed the photos as needed.


On what would be the left page I decided to carefully adhere the photo to my matte piece and then create a pocket with them using Xpress It Double Sided Tape, so I could tuck the adorable tags from   behind them to give more layers but I would also be able to get my daughter to journal about this memory or I could journal about our Facetime chat about it at a later date.


I then added my piece of lace and selected one of the words that I had trimmed from  and adhered them down with Helmar 450 Quick Dry Adhesive.


Now to move onto the right hand page.
I worked out my layers and I knew I wanted to add a ballerina to this side so I fussy cut her out and tried to save as much as the card as I could so I could tuck it in to the layers on both pages to give more texture.

On the left page I tucked a section from the card under the lace.


I tucked a piece of the card behind the Ballerina I fussy cut from the card and slightly under the photo.

When adhering the Ballerina I just put some glue down the middle of her so she would still have some dimension.

She really is perfect for these photos of my Granddaughter, isn't she?


Finally I adhered my 2 pages into my Traveler's Notebook.
I love how the double page spread turned out.


Friday, 29 December 2017

Paw Patrol 1st Birthday Pop Up Box Card - The Scrapbooking Emporium DT

I apologise this post is low on photos and the photos I took are not good quality, I was having issues with taking photos at the time.

My granddaughter loves Paw Patrol so I wanted to make her a special card for her 1st Birthday on November 23rd (born to be a Whovian this girl is). 

When my November DT Kit from The Scrapbooking Emporium arrived I felt the ombre side of the Fish paper from Summer Splash by Kaisercraft was perfect for representing the sky on my card.  I used the middle section to create my sky pieces


I used my Silhouette Curio to cut the words Happy Birthday, the number 1 and a balloon from blue glitter cardstock and some balloons from red cardstock. I also used my curio to cut the Paw Patrol characters, they are so cute.

As I was unable to film this here is a tutorial on making a Pop Up Box Card.  I did not use these measurements as I wanted mine to be slightly wider.  And I only did a half inch tab as I felt it didn't need a inch.

I put my sky on the back and side flaps so that when it is folded flat it has a nice sky but the paw patrol logo is on the same paper  on the front right, it was the perfect paper for behind that.


This card was quick to make once I had all my components cut.  They are really fun cards to create  and give, so if you haven't tried one why not give it a go.


Wednesday, 27 December 2017

Travelling - Scrapbooking Emporium Design Team

Today I have a layout I created for The Scrapbooking Emporium Design Team.
I have a process video for you that I hope helps inspire you to record your travels.


When I saw Open Road from Kaisercraft I was really concerned I would have a creative block using it but as soon as I got my hands on the Australia Map die cut I knew it was perfect for recording my Childhood Travels.  I love that it was perforated and I could just use the States I needed.

The only photos I have of my Childhood Travels are 2 photos on London Bridge at the 12 Apostles in Victoria, one of which I scrapped for my time as a Guest Designer with Counterfiet Kit Challenge.  So I have a similar plan to my Christmas memories in that I am Google Image searching the places and printing photos of parts I remember to record the memories but this Map was perfect for recording the places I went as a child.

I used the geomarkers from the Sticker Sheet to mark the places I went with our best friends the Schumm's and marked the other places with my old CM pens using a different colour for different stages of my childhood travels. 
My memories of travelling with the Schumm's and Uncle Des are incredibly important to me even though they are faint since I was so young so it is really important to me that I record them.
Since finishing I realised I forgot to mark Philip Island with a geomarker as our families went to see the Penguins together when I was very young, so I will have to fix that.


I cut some gum leaves with my Silhouette Curio and used a stylus to put a vein in them and then inked them with Distress Inks, using Old Paper on the leaves and Walnut on the branch section.
In the clusters of die cut gum leaves I added gum leaves from the sticker sheet.

I added in the gum leaf stickers from the sticker sheet to both clusters in my title and 1 Kookaburra to the cluster with they word Travelling.

I trimmed some of the sticker leaves and added a Kookaburra to them to hide where there is a small gap in the map.
I love these Kookaburra stickers and wish the sheet had more than 2.


Up the top right to balance the page I added a Geomarker and leaves to the word sticker that says we were here.


I love how the layout turned out.  I think it is so important to record our memories whether we have photos or not.

I  went with A4 as I want to try mixing up my layout sizes in my album and I cut 2 tags from the same background cardstock.  I have not edged them or decorated them as I want them to blend into the back so so the map is the focus.


Make sure you check out The Scrapbooking Emporium.

Friday, 8 December 2017

Christmas 2017 YouTube Hop - Childhood Christmas Memories Book


Welcome to the Christmas 2017 Aussie YouTube Hop.  
Wow can you believe it has been a year since I posted in a couple of groups asking if anyone would like to do a December Projects YouTube Hop with me and the lovely Morgyn jumped on board and has been just such a amazing organiser, these hops would not be what they are without her work on creating so much of the behind the scenes bits that make them work.
To think before this project our only contact was seeing each other post in scrapping groups and responding to some of each other's posts and now she is one of my dearest friends.  This Hop has been a wonderful way to make friends and share the hobby I love.  Thank you for supporting it by watching and commenting.


As we are celebrating a 1 year of Hops we have 5 wonderful sponsors for you, with 5 fantastic prizes in the prize draw, so please check them out.

Aunty Vera Scrap & Craft
Cocoa Vanilla Studio
Corbett Creations
Kitaholic Kits
Scrapping Fun Kits


Check out a couple of the awesome prizes in our Prize Draw.

From Aunty Vera Scrap & Craft we have a $50 Voucher with free postage.


From Scrapping Fun Kits we have a DD Kit.


From Corbett Creations we have a $20 Prize Pack.
From Cocoa Vanilla Studio we have a $25 Voucher.
And from Kitaholic Kits we have a Mini Kit.
Wow what a great prize pool.


For my project I have altered the cover of a Little Golden Book to use for my Childhood Christmas Memories.  
I used multiple items from my Scrapping Fun Kits DD Kit, a wood veneer tree from Scrapping Fun Kits July Kit and a burlap tree from a Christmas Garland I bought last year.


You can find a Playlist for the Hop here.

Christmas 2017 YouTube Hop order
Suzanne
Raelene
Lauren WK
Katie 

Amy
Lauren H
Chrissi
Silvia
Morgyn

Have you joined out Facebook Group for our Hop Fans yet?  

I hope you enjoy this Hop there are so many wonderful projects from these talented ladies, so much crafty inspiration.  
Make sure your entry is complete by watching every video and leaving a comment.  
If you love our work make sure you subscribe to us and give our videos a thumbs up.

Thank you for supporting our Hops.

Tuesday, 31 October 2017

Friends - Scrapbooking Emporium Design Team

Today I have a layout for the Get Crafty/Scrapbooking Emporium Design Team to share with you.

Kaisercraft Rose Avenue and the gorgeous flowers, ribbon and metal filigree from The Scrapbooking Emporium were just such a lovely combo for a spring layout I knew they would be perfect for this selfie taken when I was catching up with a friend I haven't seen in 22 years who kindly offered to drive Mr C, Mr E and myself to where we needed to go that morning.

The blue organza ruffle ribbon was perfect for making a scrunchy flower.  I wound it around my fingers and then stapled it together, added some Helmers Professional Acid Free glue to the centre and popped this blue flower from my stash in the centre.


First I created my layers of papers behind my photo.
Then I started building my embellishment clusters using the flower I had created, the lovely pale pink roses and metal filigree that was included in my DT kit and some of the gorgeous white lace I received last month combined with a assortment of wood veneer from my stash and some small pink roses, some blue paper flowers from my stash.

The filigree has lovely delicate details.  I just love it.
Once the page protector is on the ribbon flower sits down really nicely.


The film strip wood veneer my friend Shay gave me was the perfect way to ground the cluster and help it all come together.

I do love how this layout turned out.

Have you created anything with Rose Avenue?  I would love to see it.

Monday, 9 October 2017

Lily Traveler's Notebook layout - Scrapping Fun Kits Design Team

I created this layout for the Scrapping Fun Kits Bi-monthly Moodboard Challenge using my one of the Concept Kits I created when I first had the idea for a TN Kit and bits from my September Embellishment Kit.


It came together quickly and was a lot of fun to create.
The lemon and peach paper from the September Kit worked really well with the other bits from my concept kit.
I trimmed the paper so I had a small strip on the right hand page to carry the layout onto that page.


The tag behind the photo is not stuck down so I can add more to it and use it as a pull out if I need to.
It helped the pink/peach colour from the background paper pop a bit more.


This gorgeous thin script washi spread over the 2 pages helped pull the 2 pages together.
I also added this floral vellum sticker to the bottom spread over the 2 pages that matches the circle floral sticker at the top on the right with the washi to help pull it all together.


I am loving how quick and simple scrapping in a TN is, it is a great fun way to create and I look forward to having a more portable option to take with me on the tilt train than what I did last year.

I have created a Pinterest board full of TN Scrapping Layouts, so if you would like more inspiration why not check it out, this type of scrapping I am finding is a great option for the time poor scrapper like myself.

Sunday, 1 October 2017

Making Wonderful Memories - Get Crafty/Scrapbooking Emporium Design Team

Today I have a layout for the Get Crafty/Scrapbooking Emporium Design Team to share with you.
This layout uses this month's sketch challenge and one of the gorgeous ranges they are stocking this month, Kaisercraft's Mint Wishes.

I have chosen to use sides of the papers that aren't distinctly Christmas so that my layout has a more Spring feel to it.

I trimmed 2 stickers to create my little title Making Wonderful Memories.

Even though the paper covered in words has words that we associate as a Christmas combination I though it would work in a non-Christmas layout that is about happiness.


As I didn't have my photos printed for this layout I backed the flower sticker onto cardstock and fussy cut it out from the cardstock, then I used the cardstock scraps folded in 2 to lift it a little, adding them just along the bottom of the sticker so I can tuck my photos in behind the sticker when I get them printed.


Such a gorgeous range that is very versatile.

Process Video is now up.

Tuesday, 26 September 2017

Bellingham Maze layout - Scrapping Fun Kits Design Team

Today I have a Design Team layout for you for Scrapping Fun Kits.
I love the colour combination in the September/Spring Kit.  Even though this trip was not in Spring the supplies helped add to the fun of the layout which was a great way to enhance the photo from this fun day at Bellingham Maze on the Sunshine Coast several years ago.  I will add a second layout for the journaling as there is a fair bit to tell about this day.

In addition to my September kit I used papers from my stash that have been pulled from their collections/pads so I am not sure what a couple of them are but I think I used a combination of Kaisercraft, Shimmelle or Maggie Holmes papers.  I also pulled out left over bits from a embellishment kit from My Scrapbook Room


I did have a creative block while working on this layout so I reminded myself of what I said in a post on Mercy Tiara's group Saturday and just stuck things down, I committed and hoped it would work.
I started by sticking down the bird and butterfly washi in the top corner but I needed to stick more down.  I needed to stop thinking about how it would all come together, I needed to just get the paper layers down and then play with embellishments and let the supplies work for me.
I finished off with a wobbly pen border.


I am quiet happy with the results and please with what I created when having a creative block.

Due to technical difficulties my Process Video has not been able to be uploaded.  Hopefully tech support aka hubby can fix the issues later today so I can share it with you.

Sunday, 24 September 2017

Wedding - Get Crafty Design Team

Today I have a Design Team layout for the Get Crafty Design Team to share with you.
When I saw these gorgeous black and white papers in the Kaisercraft Christmas Edition range I was drawn to the fact so many of the papers would suit music photos or wedding photos so decided to use this photo of eldest daughter and Mr C at my brother in-law and sister in-law's wedding in 2011.

This lace from Get Crafty is just stunning and the perfect compliment to this range.
I also added a heart from Charms Creations and a sheet music bow paperclip from my August Kit from Scrapping Fun Kits.


Unfortunately I couldn't access my alphas so I left the page incomplete until I can access my alphas again.  I love the layout, the papers, lace and black roses from Get Crafty are just a gorgeous combo for this photo.


Do you use Christmas supplies for other projects?

I have some gorgeous Christmas themed bits left from the range to use with this year's Christmas photos.

Friday, 15 September 2017

Kaisercraft Letters To Santa - A Christmas Tradition - Get Crafty Design Team

Today I have a Christmas layout for you using Kasiercraft's Letters To Santa range for Get Crafty Ipswich.  
I think this is my favourite of the Kaisercraft Christmas ranges this year, it is a lovely traditional Christmas themed range.

I loved the quotes on the cut apart papers and the advent calendar paper in this range and felt they were perfect for scrapbooking the last Santa photo that all 4 of my kids were in.  As families change so do traditions and now this tradition is just my younger 2 as my adult girls are now creating their own Christmas traditions so this lovely piece of chipboard from 2 Crafty Chipboard was just perfect for this layout.  I received this in my prize pack for the June 2016 Scrap The Boys Challenge.


I loved these filigree pieces from Get Crafty, they were a perfect accent for my handmade poinsettia.
I loved this quote from Believe In Magic paper.
Check out my video to see another page trimmed ready for my December Project this year.


I love how my layout turned out.

I am really looking forward to recording Christmas this year.
Have you been getting your scrapbooking supplies ready for Christmas?  


Thursday, 17 August 2017

Elvis To The Max - Scrapping Fun Kits Design Team

I am loving this Music Kit from Scrapping Fun Kits.
Music themed kits are hard to come by and I need a lot of Music themed supplies with 3 children who play instruments, being a family who loves to listen to all varieties of music and well Music themed supplies are great for baby layouts, Christmas layouts and all kinds of projects.


Coralee toured as a cellist with Elvis to the Max 3 years ago for his Mackay and Rockhampton shows.  It was a fantastic experience and she made some wonderful friends on tour.
I love this photo of her with Max and really wanted to get it scrapped so this kit was perfect for doing that.

This layout is another layout featuring my challenge of limiting my supplies, the background is just white cardstock with some black ink drops and a strip of the musical instrument washi across the entire sheet.
I unfortunately got some ink and glue in places I didn't intend to so had to change how I would have preferred to do my clustering on this to cover as much of this as possible.  I still love how it turned out.  

Unfortunately the Process Video glitched so I don't have a video for you.

Are you loving the Music Kit as much as I am?
Are there any themes you would love to see more of that are hard to find?