Friday 26 July 2019

Steampunk Goggles and Sunglasses - Helmar Creative Team

Today I am sharing with you the Steampunk Googles and Sunglasses the boys and I made for Steamfesta.
As the boys and I were working on our projects at the same time I don't have photos of everything but I wanted to share with you how we made some big goggles with safety glasses from Bunnings and Pringles Cans and then some photos and details about E's toilet roll goggles and my quickly made Sunglasses.
We focused on the boys Goggles first as they were both volunteering at a promotional event and needed at least a pair of Goggles each so we searched Google Images for ideas, watched and read some tutorials and then just played with our collections of bits and pieces and Helmar Glues until we had projects we were happy with.  My Sunglasses would wind up being a last minute thing 2 days before the event as C was having a creative block with his Goggles so we decided I would take over finishing them and he would do Sunglasses but the Goggles didn't suit my costume so once finished and he loved the Goggles we switched.  This has been a creative journey and I wanted to explain how we would up where we did.
First we grabbed together our supplies.  We weren't sure what we would use but having it all out ready was important.
Helmar 450 Quick Dry Adhesive
Helmar Premium Craft Glue
Helmar Gemstone Glue
Helmar Fabric Glue
Paint
Gesso
Watch parts
Cogs and Gears
Pringles cans
Safety Glasses
Toilet Roll
Cutting Mat
Craft Knife
Picture Frame Hanging bits
Brads
Trim
Yogurt Pouch lids
Medication bottles
Physiotherapy/Yoga tubing.

For the Safety Goggles/Pringles Can Steampunk Goggles we cut down the Pringles cans and used the tops.
C adhered them to the Safety Goggles with Helmar 450 Quick Dry Adhesive.

Once the glue was dry C gave the Safety Goggles and Pringles cans a coat of gesso followed by Black paint and then he added metallic paints over these, at first just using a brush and then rubbing with his fingers as this got better results.
And this is when C got stuck, he wanted his Goggles to have certain aspects that created a creative block for him so they sat waiting to be finished for a few weeks until 3 days before the event I asked if I could take over finishing them and instead he Steampunk some metal framed Sunglasses by adding watch parts to them.
Photos are limited of this next stage as I needed both hands and couldn't use my camera while doing them, but I will talk you through how I did it.
I started by adding some grey trim like the brown trim I used on my Steampunk Handbag that I had rubbed gold paint on, adhereing it around the Goggles where the Pringles Cans meet the Safety Goggles to hide the seam I used Helmar 450 Quick Dry Adhesive to adhere this to my Goggles.
I then added cogs and gears in the bridge of the nose section using Helmar 450 Quick Dry Adhesive to add some cogs and gears to this area, starting with a wood veneer one I had painted to bring it up to the level of the trim.

Next I painted some Physio/Yoga tubing with some black paint and then with gold paint and figured out how I could attach it to my Goggles but poking one end into the bridge of the nose section so it was adhered both down to the Goggles and the gear and trim with Helmar 450 Quick Dry Adhesive.  I then worked out a pathway for this smallish piece and adhered that down with Helmar 450 Quick Dry Adhesive adding a Yogurt Pouch Lid I had painted with black paint and then rubbed gold and silver paint to on top of the tubing with a lot of Helmar 450 Quick Dry Adhesive.

I then added another tiny bit of the Physio/Yoga tubing as the Yogurt Pouch Lid needed something else under the other side and adhere it down where it looked like it should go.
I then hid imperfections with Cogs and Gears.
To finish off I painted my dry glue first in black and then adding metallic pain to make what what visible look like welds.

 While I was working on decorating the Goggles C worked on the Sunglasses.  They turned out so cute.
He used Helmar 450 Quick Dry Adhesive to adhere the watch parts to the bridge of the nose as he forgot the Helmar Gemstone Glue was on the table next to him.


And our third pair of Goggles are E's toilet paper roll Goggles which he made while C was making the base of his Safety Goggles/Pringles Can Steampunk Goggles.  I have only one photo from the creation process but I will talk you through it.
E cut the toilet rolls into the needed shape with the help of a adult and cut some strips to add rims around the Goggles and a piece for the bridge of the nose.
He adhered the rims and nose piece to his Goggles with Helmar Premium Craft Glue.
He painted his Goggles first with a base of black and then bronze, brass and silver.
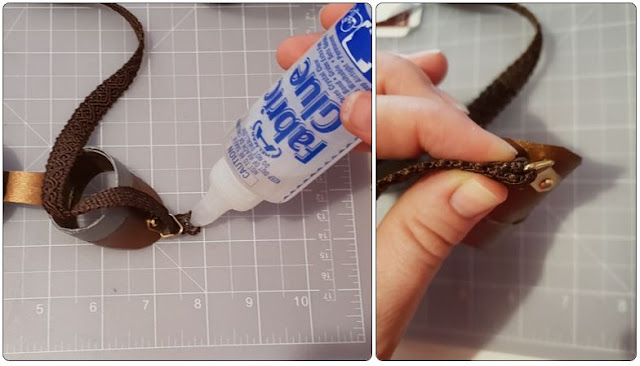
He then added some picture hanging bits to the sides of his Goggles with brads and threaded some of the brown trim I used on my handbag through the picture hanging bits.  Adhering the Trim back on itself with Helmar Fabric Glue.

He then adhered various watch parts to his Goggles with Helmar 450 Quick Dry Adhesive.
They turned out so cute and look perfect on his hat.



Wednesday 24 July 2019

Purple Birthday Wishes - Ruby Rock-it Creative Team


When I saw the new Bella Purple Haze range I just had to make my daughter a Birthday card, she loves purple and the gorgeous PH203 Purple Haze Ballons paper was perfect for a card.
So I pulled out a some purple card bases from the Francheville Cards & Envelopes boxes Primary and Pastel and a assortment of purple bling from Crafter's Choice, some Fundamentals Tags and some Francheville Glitter Silver Doilies and I started playing.
Once playing I would add some Ruby Rock-It GZ51 Glitz Cardstock Lavender, Crafters Choice Bling Borderlines Purple and the adorable FUN83 Fundamentals Sentiments stamp set to my kit, along with mini Distress Inks in Shaded Lilac and Wilted Violet.


I decided to start by working on a tag.  I blended Shaded Lilac and Wilted Violet mini Distress Inks on my tag, leaving some white area.


Then I grabbed out my FUN83 Fundamentals Sentiments stamp set and stamped 2 of the flowers and the Happy Big Day sentiment with Wilted Violet Distress Ink on my tag.
This stamp set is so very handy.  It has a wide variety of sentiments and items that are the perfect size for cards and tags and it's compact size makes it great for crafting on the go.  I love it.


I then decided to add some gorgeous Purple Crafter's Choice Bling to my flower centres.
Decisions I make later on the card will have me changing this, but I really do love this shade of purple.


Now time to work on my card base.  I made a final decision on which card base to use, the purple from the Primary box or the more lilac colour from the Pastel box I went with the Primar to sort of pull the Wilted Violet in a bit better.

I decided to grab out my Ruby Rock-It GZ51 Glitz Cardstock Lavender and create a layered affect with the PH203 Purple Haze Ballons paper but cutting windows out of my pieces.
I cut my Ruby Rock-It GZ51 Glitz Cardstock Lavender to 4 1/16th inches x 5 3/8 inces and I cut my PH203 Purple Haze Ballons paper to 3 7/8 inches x 5 1/4 inches.  I then came in a 1/2 inch on all sides of both pieces to created my frames/windows.


I started building my layers by adhering my frames of Ruby Rock-It GZ51 Glitz Cardstock Lavender and PH203 Purple Haze Ballons paper down with Helmar Acid Free Glue to my card base.


I decided to add my next layer with foam tape.
My inner piece of Ruby Rock-It GZ51 Glitz Cardstock Lavender was a perfect size, however as I always need some wiggle room and foam tape isn't forgiving I cut a new piece just a fraction bigger so if I didn't get it perfect it wouldn't be as noticeable.  I cut it at 3 1/4 inches x 4 1/2 inches.


I just adhered the inner piece of PH203 Purple Haze Ballons paper as is with Helmar Acid Free Glue. 
It was slightly too narrow so I off centred it to the right and covered the left with bling in my next step.


I decided to cover my left side of my top pieces with a Francheville Glitter Silver Doily cut in half and some bling that I hadn't gotten out when building my kit, the Crafters Choice Borderlines in Purple.
I then sort of tucked my tag in under the bling and adhered it down with Helmar Acid Free Glue.


See you can't tell that my top piece was slightly incorrect.
I also added some Baker's Twine from my stash in a purple similar to my card base to help pull it all together.


I decided to add a die cut butterfly that I had coloured with mini distress inks for another project to the top right corner of my card.
I adhered it by just adding some Helmar Acid Free Glue to it's body so it's wings could be sitting up.


I then decided the butterfly needed a body that matched my bling boarder as should my flower centres on my tag so I cut some of the lilac gems from the left over trim to use on these.


And I called my card done. 
I am really happy with how it turned out.

Thursday 18 July 2019

FraserPop 2.0 - Cheshire Cat Cosplay

In the lead up to FraserPop 2.0 they advertised they would be having a Mad Hatter's Tea Party and as I had always wanted to do a Alice In Wonderland costume (long before I even considered trying cosplay) I thought it would be cool to do a Alice in Wonderland cosplay but I quickly dismissed it as I didn't think I would be able to find anything.
Shortly after dismissing the idea I was doing some op-shopping and it entered my mind as I parked my car, I walked into my local St Vinnies op-shop thinking "If I find a dress that is suitable for converting into a Alice In Wonderland cosplay then I will grab it and go with what ever character suits."  As I walked in the door I looked up and there was this hideous pink dress, checking the size it was 1 size above my size and just $4 so I grabbed it and so started the journey to creating my second ever cosplay, 1st cosplay with some DIY needed.  My Cheshire Cat cosplay.


On my way home I popped into Lincraft and grabbed some purple fur fabric to make fur boot covers and add purple stripes to my dress, some pink and purple tulle to attempt a petticoate, some pink felt for my ears and some pink and purple wool to make my tail.


Before cutting 4inch wide strips from my fur fabric I needed to cut out my Ears (tutorial can be found here) and Boot Covers so that I could cut all the remaining fabric into 4inch strips to ensure I had plenty of stripes to work with.

Wearing the boot covers on the day I noticed some problems with my design so my next adventure into boot covers (my Steampunk costume for Steamfesta) I experimented with a fix to the issue, I am hoping to add this to my fur covers before Saturday so I will share photos of them after this weekend.

I cut off the bottom of the dress as it was a little long and the stripes were not suited to my Cheshire Cat.
I just did a rough hem as it would be hidden under my purple fur stripe.
I used Helmar Fabric Glue to adhere my purple fur fabric starting at the bottom and working my way up.


Now to make my tail.
I created wool tassels and brushed them out with a wire pet brush.  
I pricked my fingers so many times doing this and it became quiet painful.  Wendy used a old Barbie hair brush for her wool feathers in the Beautiful Australia YouTube Hop so I am on the hunt for a old Barbie hair brush whenever I go to the op shop to use for future project like this.


I then platted several strands of wool together and started tying my tassels to my plat until I had a awesome tail.  I wore it on the day by simply pinning it to the back of my dress.


To finish my look on the day I scrunch my hair with hair mousse and then sprayed it with a full can of pink hairspray and I attempted to give myself a Cheshire Cat look with pink and purple makeup, I struggle with applying make up due to my hand issues so this was a challenge, as was finding pink and purple makeup, it just wasn't around at the time.
I am happy with my results but really excited that my daughter who is very good with makeup including costume makeup is attending FraserPop 3 this year and will do my makeup for me and best of all we are doing a little group cosplay with my daughter joining me as the Mad Hatter and my Granddaughter as a adorable Alice.  :)


Will you be attending FraserPop 3 this year?
I hope you can make it as it is a great event.

Wednesday 17 July 2019

Friends - CraftOnline Creative Team

I love Typography but due to my hand issues I can't do it myself so I was scrolling through CraftOnline's shop looking at the various Typorgraphy type stamps and fell in love with the range from Pretty Quick, the "Friends are like Stars" stamp had me thinking about how it is so true of my friendships, we go for long periods of not seeing each other or chatting but when we are there and when we do get the chance to see each other it is like no time as passed.
This lead to me thinking about my friend Shirlee who makes gorgeous cakes for my family and how this stamp makes me think of her so I decided I would scrap the photo of the cake she made for C's 14th and keeping where his party was held in mind I started exploring the store for anything that would suit a computer game themed layout.


https://www.youtube.com/watch?v=UUp6dHiYtxU&feature=youtu.be

Here is my process video for this layout.    You can click on the above pic to have the video open up in YouTube or click on the below video to watch.


Close up pics of the various aspects of the layout are further down in this post.


Items used on my project.
Poppy Crafts 6x6 Textured Cardstock pad
Pretty Quick Inspiration Friends Are Like Stars stamp
To get a nice clear image from the quote stamp you will need a precision stamp tool such as the Misti or the Stampmaster Precision Stamping Tool I used.
Dina Wakely paint in Evergreen
Helmar Liquid Scrap Dots
Poppy Crafts Wooden Elements Birthday 
Helmar Acid Free Glue
Helmar 450 Quick Dry Glue
The Stamping Bella stamp I used is now sold out but I think Oddball Geek would be also suitable (still available at the time of writing this.)
Eyelet Outlet Video Game brads
Dina Wakely Washi Tape #4
49 and Market Captured Adventure 6x6 paper pad
The PhotoPlay paper I used is now out of stock as is the individual sticker sheet from Birthday Boy Wishes, however the collection for Birthday Boy Wishes is still available and has a great green paper that would work well with this layout, I didn't order it as I had Jurassic.
I stamped my images with Archival Ink in Black and Grey on watercolour paper.
I coloured my Gamer image with the following Distress Inks: Victorian Velvet, Antique Linen, Brushed Corduroy, Gathered Twigs, Black Soot, Hickory Ash, Blueprint Sketch and Chipped Sapphire.
I used the packaging technique on my cardstock and my stamped quote with Distress Ink in Twisted Citron and Mowed Lawn.
And I sealed all my items I had used Distress Ink on with Helmar Crystal Kote Fixative.


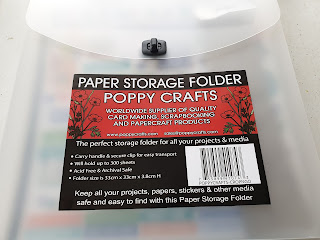
After I had all my bits I decided to add the new Poppy Crafts Paper Storage Case to keep my supplies in when working on a specific project.  And I grabbed a new pokey tool so I grabbed the Poppy Crafts Embossing Tool as one end is a pokey tool and the other is a little spatula and a T-square as I really needed these.


This quote was perfect for this layout, not just for describing our friendship with Shirlee but for describing my son's friendships as some of his friends he doesn't get to see often but when they get together it is like no time has passed.

The balloons from the Birthday Boy Wishes range were perfect to pop behind my Oddball Gamer and cute wood veneer party hat from the Poppy Crafts Wooden Elements Birthday that I painted green really helped tell the story of the layout.

And how cute are those game controller brads?


I am really happy with how my Oddball Gamer turned out, Distress Inks are a great way to add colour to stamps.

The Helmar Liquid Scrap Dots gave him the lift he needed to pop.


The grungy papers from the 49 and Market Captured Adventure 6x6 paper pad combined with the green paper and the cute balloon number stickers really helped tell the story .   Adding some doodly balloon string and doodly boarders helped things feel finished.


Creating a little quote card with the little quote that comes with the Oddball Gamer and combining it with the celebrate die cut from the Happy Hooray range that I used on my son's Fortnite layout and one of those cute game controller brads also aided in the telling of the story I think.
I think that Dina Wakely Washi was perfect for this layout.


I am really happy with how this layout turned out.  The Birthday Gamer Kit I pulled together was the perfect way to document this event and that gorgeous quote stamp really helped add that aspect of story telling regarding friendship to the layout.

I hope this has inspired you to create something.  If it has and you wind up creating a project due to this please let me know, I would love to check out your project.

Tuesday 16 July 2019

FraserPop 2.0 - What we loved.

As FraserPop 3.0 is just days away.  We are getting really excited and I realised I haven't finished my FraserPop 2.0 blog posts so I wanted to share some of our experiences of this awesome event last year.  

We loved FraserPop 2017 and were so excited to hear the staff say it was such a huge success they  would be making it a annual event, so as soon as the dates were announced for 2018 I put it in my diary.
FraserPop 2017 was our first con and definitely something we hope to attend every year.
2018 didn't disappoint, it was bigger and better, the students and staff did a fantastic job.  If you haven't been I highly recommend attending in 2019 which is going to be much, much bigger from the posts so far.

At FraserPop 2.0 one of the new things was The Store Of Requirement setting up in the room they used for the Doctor Who display in 2017.  This room is perfect for getting that Hogwarts feeling in a small space.  The boys enjoyed some Butter Beer and E bought himself some Gryffindor robes and a tie.
You can see my layout about the Butter Beer here.

It was really hard to get a good photo to show just how perfect this space is for this set up.  Hopefully I can get one this year.

Day 1 of FraserPop 2.0 E wore his Sans cosplay that he wore to Supanova 2017, he added pink slippers to it to finish the look.  And C wore his 11th Doctor cosplay.


Day 2 the boys wore their 10th and 11th Doctor cosplays.
As C was growing his hair to donate it was at a length that was impossible to style how it was needed but he made do. His donation happened at the end February and he is feeling much lighter now, and looking forward to being able to style his hair at FraserPop 3.0.

When having some food we wound up sitting next to a family whose son was cosplaying The Empty Child so we got a pic of the 3 boys together.

At FraserPop 2.0 they created a prop room which had all the Doctor Who stuff they kids had created including some wonderful new items like K-9 and Darleks as well as props from a wide variety of Pop Culture like Stranger Things, Goonies, Indiana Jones, Game of Throwns, etc.
They created a transportation display which included the TARDIS the students built in 2017, a SHIELD vehicle, Delorian, Herbie Beetle, etc. 
This year there will be a Batmobile. 

Brick Events set up a fantastic Lego Display and came back later in the year to do a full event at Maryborough State High School.

There were so many fantastic vendors this year, they had to have stalls outside the Gym as well as inside.  It was fantastic.  Make sure you check out the vendors this year as there are so many talented local artists who do stalls at this event.

Other things we enjoyed included The Sons of Obiwan Saber Academy, 501st Redback Garrison, Laser Tag, VR, watching the Cosplay competition.  We missed out on tickets to the Mad Hatter's Tea Party that inspired my costume, I am hoping to get tickets this year to take my Granddaughter to it as my daughter and Granddaughter are visiting for FraserPop 3.

So do yourself a favour and check out FraserPop 3 this weekend, you will have a lot of fun.

I will post about my Cheshire Cat Cosplay I wore to FraserPop 2.0 soon, so watch this space.

Wednesday 10 July 2019

Pink and Lilac 1st Birthday Card - Ruby Rock-It Design Team


My niece is turning 1 so I needed a card for her Birthday and the adorable Baby range from Bella was the perfect inspiration for this card.
So I pulled together a little kit for myself that included BBY574 Baby Girl Starry Night, BBY567 Baby Girl Onesie, Francheville Cards & Envelopes Pastel Pack, Crafter's Choice Bling Flowers in pink, Crafter's Choice bling alphas and Francheville Mini Doilies in White.


I started by fussy cutting out some onesies from the Onesie paper and as I don't like to waste anything I even cut to half onsies from the corner of the paper and glued them together.

The card base I chose was this lovely pastel lavendar base so I wanted to colour one of my onsies to be a similar colour so it would pull it all together.  I selected Shaded Lilac from my Mini Distress Inks to colour one of my onesies and as I wanted to edge my pink onesies to hide any little hints of white edge I grabbed out Victorian Velvet as the closest match to the darkest shading on the onesie.
As you can see the edging with the Victorian Velvet was perfect, you can't tell that I inked it and that was the look I was going for.

The Shaded Lilac created a lovely soft change.  I just blended the ink on and then spritzed it as I wanted a smoother finish and dried with my heat gun.
Now that I had my bits I cut down my Starry Night Paper to fit my card front with just a hint of the Lilac showing behind it and played with my supplies until I had a cluster I loved.


I grabbed out some dusty pink flowers from my stash and this adorable orchid that is a lilac colour which I bought at a destash market to add to my card so I could pull more of the lilac into the front.

Once happy with what I had I glued my items down with a mix of Helmar Glues.  The doily and 2 of my onesies were glued down with Helmar Acid Free Glue, the flowers were glued down with Helmar 450 Quick Dry Adhesive and for my top onesie I used Helmar Liquid Scrap Dots to give it some pop.

I finished off my top onesie by adding a adorable flower from the Crafter's Choice Bling Flowers in Pink on the right side of the chest of the onesie.

To finish off my card I added ONE in Crafter's Choice Bling alphas into my cluster of embellishments.
I love how my card turned out and can't wait to give it to my niece.