Monday, 21 October 2019

Christmas Pocket TN set up - Ruby Rock-It Creative Team


When I saw the new Crafter's Nostalgic Treasures range I loved it's traditional colours and thought it would be perfect for my planner set up for the lead up to Christmas, journaling the events of November and December that involve traditional colours and scrapping memories that need those gorgeous traditional colours.


I have been having a bit of a creative block and my usual tactic of just sticking something down and keep sticking until I am happy with what I have hasn't worked so I used my other creative block ending tactic of picking a simple project that needs doing and just doing it.
I have wanted to try using a Field Notes sized TN as my wallet for ages and scored a cover cheaply the other week which came with a insert that had no cover on it so I decided to break my creative block by making a removable cover for my insert and see where that takes me.

I decided I wanted to use the foiled papers in the 12x12 paper pad from the Nostalgic Treasures range for my pocket TN and if this went well I would make a few items for it to give myself a cute Christmas planner to carry with me.
I loved the first paper in the pad so cut a piece measuring 5 5/8 by 7 1/2 inches.
I wrapped it around my insert, creased and then trimmed any overhang.

I then cut a piece of the gorgeous mirror gold cardstock from the Crafter's Choice Luxury A4 Gold Cardstock pack the same size, scored it and then adhered it with Helmar Acid Free Glue to the inside of my paper.  This would give the cover some needed structure and it looks gorgeous.  


Best of all my TN cover has gold elastic and gold on the inside so it coordinated beautifully with my TN cover.


I used some Distress Ink in Fired Brick around the edge of my paper.


I had a slight misalignment so I used a old border punch from my stash with the Gold cardstock I lined the inside of my cover with and punched a border for my front cover, adhering it down with glue.

I then grabbed out my pack of Crafters Choice Nostalgic Treasures Die Cuts and selected the car and a Merry Christmas die cut to use on my front cover, adhering them down with glue.


I added the word Plans under the word Christmas with some alphas from my stash to finish off the look.

I now have a adorable notebook for writing down notes about my plans for this Christmas, gift ideas, names of recipes to try, etc.


While I had the Crafters Choice Nostalgic Treasures Die Cuts out I decided to make some cute paperclips for my Christmas planning.
I sorted through the die cuts and found ones that would match back to back.


I added a glob of Helmar 450 Quick Dry Adhesive and placed my paper clip in it before adding my other die cut to the top.
I left them to dry for a while to ensure a strong hold.


I decided my cover needed something so I grabbed out my Crafters Choice Nostalgic Treasures Tag Pack and selected a tag to tie to my elastic on the front of my cover so it would look more festive.


My final need in this TN is a reward cards insert, I followed this tutorial I found on YouTube..
I selected a foiled paper to use and got to work creating it.  I now have all my reward program cards in a easy to access folder.  Organised by frequent of usage and location where I use them, as living regionally some cards are only used when I shop in other towns. 


I love how cute and festive this set up is and now feel more confident about getting my A5 planner set up for the more detailed planning at home.

Saturday, 19 October 2019

Halloween/Spring with a Sketch YouTube Hop


Wow it is time for our October Hop already, this year has gone so fast.
I am super excited about this Hop as I am participating in it.

We have a Sketch to work with for this hop and the ladies have done a awesome job interpreting it in a variety of ways.


Here is the Hop List.

Amira
Amy
Chrissi
Kristina
Niamh
Raelene (Me)
Wendy


Here is the Playlist I have created so you can easily find all the videos.


In addition to my October Daily Journal this year I am doing a October Daily Mini inside a Personal sized Filofax Domino in Aqua as Aqua/Teal are part of our Halloween as we participate in The Teal Pumpkin Project, so working in this size made this sketch challenging for me.

Head to my video to see my process for making the sketch work in a 41/4 x 7 inch format.


Here is my video, make sure you hop on to Wendy


October Daily 2019 Preparation & Day 1 - CraftOnline Creative Team

Last year I did my first October Daily project, I decided to do it the way I found success with December Daily and combine it with my journal keeping.  I loved how it turned out and wanted to do the project again this year but I am torn, I love doing my October Daily and December Daily combined with my journal keeping but I also really want to do a cute Halloween mini that is focused on doing Halloween prompts so I decided to prepare for both.


As I couldn't find my small Halloween stash so I needed to start from scratch this year and ordered some great goodies from CraftOnline.


Items used in this project
Poppy Crafts Candelabra Die
Poppy Crafts Cute Cat Die
Poppy Crafts Blooming 6x6 Paper Pad
Poppy Crafts 6x6 Textured Cardstock Pad
Poppy Crafts Christmas Glitter 6x6 Cardstock Pad
Simple Stories Say Cheese Collection
Doodlebug Planner Insert Daily Dots Daily Doodles Calendar
Tim Holtz Ideaology Countdown Brads
Helmar Acid Free Glue
Helmar Chrystal Kote Matt Varnish
Dorland's Wax Medium
Universal Crafts Embossing Tool
Stickmaster Heat Resistant Double Sided Tape 
Distress Oxide Seedless Preserves
Distress Oxide Carved Pumpkin
Distress Ink Peacock Feathers
Distress Ink Wild Honey
Distress Ink Black Soot
Distress Ink Carved Pumpkin
Vellum
Silhouette Die Cutting Machine
I used the older Universal Crafts Fine Line Applicators but here is a link to the new ones that I can't wait to try.


I adapted Serena Bee's October Daily Prompt List to a list that better suited a Halloween specific project as the Fall prompts don't suit me since I live in the Southern Hemisphere and I wanted to save Spring Prompts for a November project or maybe for September next year.  You can download a copy of my Prompt List here, I also added a October Awareness & Cultural Day List to the document, some Awareness & Cultural Days change each year so some may be incorrect for 2020.

I printed my prompt list on to vellum and distressed it with Distress Oxide in Carved Pumpkin and Seedless Preserves and added some Distress Ink in Black Soot and Peacock Feathers to give it a grungy Halloween look. 
I glued some adorable pumpkin paper from Simple Stories Say Cheese Collection to my page and adhered my list to it with Helmar Acid Free Glue,  washi and stickers from the Simple Stories Say Cheese Collection.

.
 I cut out the Poppy Crafts Candelabra Die from white cardstock and black glitter cardstock and then coloured the flames with Distress Ink in Wild Honey and Carved Pumpkin.
I cut the candles from the black glitter cardstock die cut and glued it to the white cardstock die cut.
I think it turned out super cute.


Click on this photo or the video below to watch my Process Video and see how I created my cover, a pocket inside the pocket, added my lists and completed my Day 1.

https://www.youtube.com/watch?v=X66bV_ZWLkY&feature=youtu.be


October Daily is a lot of fun no matter what format you choose to do it in so why no join in the fun and give it a go, it doesn't matter that it is a few weeks in you can still join in the fun.
Serena has a great Facebook Group that are full of inspiration.

Monday, 7 October 2019

Quick Wallet Repair - Helmar Creative Team

I have a really quick post of how I did a quick repair of my son's wallet with Helmar Fabric Glue as my son loves his Undertale wallet and wants to be able to keep using it and repairing things to reduce what goes to the tip is really important for the planet.


I emptied the wallet and simply ran a line of Helmar Fabric Glue along the fabric that has to adhere under the zip section.


I then held the 2 pieces together until the glue felt touch dry.

I then stood the wallet up with the coin part open and let it dry longer to ensure a strong hold.


My son is so happy that he can keep using his wallet.
71240649_2369811716478800_1104445162219634688_n


I Love Dance - Ruby Rock-It Creative Team

When I saw the gorgeous new Bella Mini Theme called Dance Queen I just had to scrap photos of my Granddaughter's first dance lesson so I decided to make a a TN kit from DQN69 Fusion and DQN83 On Pointe adding some lace from my stash. 
I decided to keep DQN76 Pose as a full sheet so I can use it with the left overs from this project to do a 12x12 layout for Miss E's album later.

I selectively cut words and cards from DQN69 Fusion to start my little travel kit and then I cut DQN83 On Pointe down to 2 pieces measuring 4 1/4 x 8 1/4 as I thought I might want to do a double page in my TN with the adorable photos I have.
I also added the 8 1/4 long scrap from doing this and a piece of Fusion that I didn't want the cards from to use the back side of both of these as layers as they are just gorgeous.


Now that I had everything ready to go I worked out photo placement on my 2 pages and trimmed the photos as needed.


On what would be the left page I decided to carefully adhere the photo to my matte piece and then create a pocket with them using Xpress It Double Sided Tape, so I could tuck the adorable tags from   behind them to give more layers but I would also be able to get my daughter to journal about this memory or I could journal about our Facetime chat about it at a later date.


I then added my piece of lace and selected one of the words that I had trimmed from  and adhered them down with Helmar 450 Quick Dry Adhesive.


Now to move onto the right hand page.
I worked out my layers and I knew I wanted to add a ballerina to this side so I fussy cut her out and tried to save as much as the card as I could so I could tuck it in to the layers on both pages to give more texture.

On the left page I tucked a section from the card under the lace.


I tucked a piece of the card behind the Ballerina I fussy cut from the card and slightly under the photo.

When adhering the Ballerina I just put some glue down the middle of her so she would still have some dimension.

She really is perfect for these photos of my Granddaughter, isn't she?


Finally I adhered my 2 pages into my Traveler's Notebook.
I love how the double page spread turned out.


Friday, 27 September 2019

DIY Dice Tray - Helmar Creative Team

Today I have a quick DIY gift idea for the Board Game lover in your life, or you could just make it for yourself.   A cool Dice Tray, the boys made these Dice Trays for their Dad for Father's Day and I thought I would share how they created them so those of you needing gift ideas for the Board Game loving people in your life can get started creating gifts for Christmas if you wish.

The purpose of a Dice Tray is to not lose you dice under the couch and to reduce problematic rolls like the dice being cocked, etc.  Keeping this in mind I kept my eye out for some nice deep frames that weren't too big so they didn't occupy too much table space.  I would have loved to upcycle a old frame but after 15 months of scouring op-shops I had no luck so bought the frames from The Reject Shop and I am trying to come up with something to use the glass for or find a artist who will use it and give it to them.
So here is what you need.
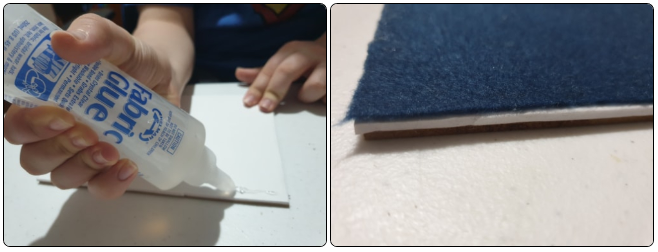
Helmar Fabric Glue
Helmar 450 Quick Dry Adhesive
Felt in your preferred colour
2mm and/or 3mm Craft Foam
Deep Photo Frames
Scissors
Pen or Pencil.


Remove the back piece from the frame, this is the part you will be working with. 
You won't need the glass or hanging hardware so save them for something else if you wish.
Place the back piece down on your foam and trace around it.  
Cut on the line. 
Do the same with your felt.

Run some Helmar 450 Quick Dry Adhesive around the outer edge of your back piece and a squiggle in the middle and adhere your foam down.


Once your Helmar 450 Quick Dry Adhesive is dry run some Helmar Fabric Glue around the edge of your foam and adhere down your felt.
Put your frame back together without the glass or hanging hardware and you are ready to role.
E made a mini Dice Tray with Green felt so our awesome DM has something a bit more compact when needed.    He had to test it out with his favourite D20 and he was pretty happy with his role.

Why not make a Dice Tray as a gift for the board game loving person in your life?  They will love it.


Thursday, 26 September 2019

A Stranger Birthday Afternoon

My daughter loves Stranger Things so when it came to a Birthday Card for her I decided to make her a Eggos themed card.

I started by designing a cut file for it that would enable it to look like 2 eggos were overlapping.
I cut 1 base, 3 of the full waffles and 2 of the waffles with a section missing.

I then coloured the base and top layers randomly with Distress Ink in Wild Honey and Fossilized Amber to give it a more toasted look.


I then started gluing my layers together with Helmar Acid Free Glue.


I then added my eggos to my card base.


My next step was adding the red lettering for Eggo, I grabbed out some really old Creative Memories alphas and added them to my card.

I then sealed my card with Dorlands Wax Sealant to ensure the alphas wouldn't peal off.


As the boys and I were traveling down on the train for a week long stay with my daughters the week before my daughter's birthday I decided to just pack the card and instead organise everything else once down there.  I arranged some awesome Stranger Things and Spiderman cupcakes to be made by her housemate who has her own cake decorating business in Brisbane (My Sweet Addiction)
I also got my eldest to pick up Christmas lights and I used her scrapping stash to make a box to fit a pack of waffles for a mini themed afternoon tea with just us and her housemates as she prefers small events.


Here is a quick how to of how I made the box.

I glued 2 sheets of yellow cardstock together with a line of Helmar Acid Free Glue.


I then measured my waffle pack and cut my cardstock to size and then scored it which was difficult as my daughter's scoring tool was missing so I had to use the back of a knife and her trimmer.  I did slip and cut through one section so I just taped it back together with washi tape.
I then cut down the sections that would form the ends.


I then used my Helmar Acid Free Glue to glue my box closed around my waffles.


The card turned out so cute.


At the afternoon tea I sat the card on top of the box so it looked like a box of Eggos.