Wednesday, 25 September 2019

Darling Girl - Ruby Rock-It Creative Team


Before I got around to doing my next layout with my kit I created for scrapping photos of my Granddaughter at a wedding earlier this year I received a lovely box full of new Bella Mini Themes from Ruby Rock-It so I decided to add the gorgeous PFF06 Fancy Florals Blossom and PFF90 Fancy Florals Bouquet to my left overs from creating my Sweet Bubbles layout as I loved the little hints of blue in the flowers of both papers, I thought it would be a good way to help pull in the blue from my daughter's hair.

So I could use the gorgeous florals in PFF06 Fancy Florals Blossom and PFF90 Fancy Florals Bouquet I cut away a section of the papers and used my Silhouette with the Pixscan mat to cut as much as possible and then fussy cut the pale flowers as it had trouble detecting them when I used the tracing tool.


I decided to create a background on my white cardstock using the packaging technique with Distress Inks in Vintage Violet and .
The packaging technique is a really easy way to get a lovely background.  You dab your ink or watercolour paint or watered down paint onto a nonstick surface, spritz with water, place some plastic packaging and then dab the packaging onto your cardstock.


I used Victorian Velvet first, dried it with my heatgun and then added Broken China.
I love the results you get with this technique.


I was having trouble deciding which way I wanted the embellishments to be so I started with adding my heart die cut white I cut from a lilac coloured card from the Francheville Cards & Envleopes Pastel Pack to my photos and gluing them down.
I selectively cut my heart die cut to spread it as much as possible, even cutting a single heart out that would have wound up behind a photo, which I added to my florals later.


I had 2 layout options I loved and couldn't decide which was my favourite so I shared them with my fellow team members to see what they thought, I love that I can bounce creative ideas off other team members.  I also left it sitting on my desk in each design for a day and walked past it regularly to see what I liked the most.

When building my clusters I added in some of blue flowers I made when I created my kit in my previous post as I wanted to include some more blue into the project.  Instructions for these flowers are in my Sweet Bubbles layout post.

My title was going to be created with a darling wood veneer I got from a destash I bought years ago and some chipboard alphas from Ruby Rock-It to spell out GIRL.
To colour my chipboard I gave them a rough base coat of gesso and then experiemented with colouring them with Distress Inks in Victorian Velvet, Faded Lilac and Broken China.
I dabbed my ink onto my alphas, spritzed with water, dried and then used another colour and repeated until I had something I liked.


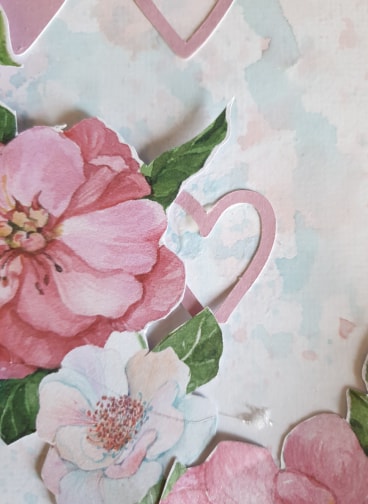
Now I was ready to stick down my embellishments, I decided I wanted to add some dimension to the layout so I glued together some scrap cardstock and adhered it to the big sections of my florals.


I tucked that single heart I cut away from my die cut into the big floral section on my layout.  I helped pull those hearts further into the layout.


I love the flowers from PFF06 Fancy Florals Blossom, they were perfect for these photos of my Granddaughter and I think if I had some of the Blush floral left they would work beautifully together so if you have some photos that need gorgeous florals then check out Blush and Fancy Florals from Bella, they are just gorgeous.

Wednesday, 18 September 2019

Father's Day Card and Manly Sea Eagles Bookmark - CraftOnline Creative Team

This year due to circumstances beyond our control we had to celebrate Father's Day with my Father In-law a couple of weeks late, so today I am sharing with you the projects I created for him for Father's Day.

I always struggle with ideas for my Father In-law so when creating a project for him gathering together a sort of kit that could work for something that suits his interests really helps me create something for him.  So keeping in mind what his career was and his love of the Manly Sea Eagles I decided I would need some products that could work with a grungy sort of travel theme or some sort of Sea Eagles project.


Check out my video to see how I created a bookmark and card for the person in my life that I struggle the most for gift ideas.

https://www.youtube.com/watch?v=dO846znZJPg&feature=youtu.be


Items used.
Poppy Crafts Stitched Labels die set
Poppy Crafts Gear Set 3 die set
Poppy Crafts Gear Set 2 die set
49 and Market Captured Adventure 6x6 paper pad
Poppy Crafts A6 Cards and Envelopes Kraft
Poppy Crafts A4 Kraft Cardstock
Poppy Crafts A4 White Cardstock
The Stickmaster Heat Resistant Double Sided Tape
X-Press It Double Sided Foam Tape
Universal Crafts Blending Tool
Tim Holt Distress Mini Ink Pad Storage Tin
Mini Distress Ink Walnut Stain
Mini Distress Ink Aged Mahogany
Mini Distress Ink Brushed Corduroy
Mini Distress Ink Hickory Smoke
Helmar Acid Free Glue
Helmar Liquid Scrap Dots
Helmar Crystal Kote Matte Varnish
Universal Crafts Embossing Tool
Dorland's Wax Medium


The X-Press It Double Sided Foam Tape and Helmar Liquid Scrap Dots really helped give my card dimension.
The Helmar Crystal Kote Matte Varnish sealed the distress inks so they won't run if the bookmark or card were to get wet.


The Dorland's Wax Medium sealed my alphas beautifully, they aren't coming up now.


I love how the card and bookmark turned out.

Wednesday, 11 September 2019

Sweet Bubbles - Ruby Rock-It Creative Team


When I saw the gorgeous Blush Floral paper in the new Bella papers I felt I had found the perfect paper to start a little kit for scrapping some photos taken of my granddaughter at a wedding earlier this year.  So I pulled together a kit to suit creating a few layouts that consisted of the Blush range, PL197 Pink Lady Montage, Francheville Cards & Envelopes in Pastel, Francheville Mini White Doilies, Distress Mini Ink in Vintage Violet and as I hadn't decided which photos to use I also included Distress Mini Ink in Salty Ocean to work with the photo that includes my daughter as she had blue hair at the time.


I decided to prepare everything first.
I cut what cards I wanted from THE654 Blush Quarters and PL197 Pink Lady Montage, so I would know what I would have left over from Blush Quarters.
Then I used my Silhouette Curio to cut the floral frame from the card that is second from the right on the middle row of Blush Quarters, the champagne bottle & glasses and some bits from the Botanicals range.  I then fussy cut flowers from THE Blush Floral.

I then went through my embellishment stash and grabbed out some lace, chipboard, flowers and a Charms Creations Heart along with a pack of Francheville Mini White Doilies.


Using my Curio I cut the word Bubbles and some other items from some Francheville Cards & Envelopes in Pastel.
I matted all my photos that I was trying to decide between so they would be ready to grab and go.
I then punched out some lacey borders from the card scraps and made some flowers from the card scraps.


To make my flowers I punch out a assortment of flowers from the cardstock scraps with some old flower punches I have in my stash and I inked the edges, the pink flowers I inked with Vintage Violet and the Blue with Salty Ocean.


I shaped them with a ball tool and a scrap of foam.


For my flower centres I grabbed out my Just Beat It SB15 Glass Seed Beads in Rose and JBX84 Round Brass Beads in Silver as I love using glass and metal beads for flower centres, they are a more archival option and they give you a gorgeous result.

I simply put a drop of Helmar 450 Quick Dry Adhesive into the centre of each flower and then placed my beads into the glue, if they needed adjusting I just used my pokey tool to move them.


I was now ready to scrap.
I worked out my photo positions and glued them together.
I split 2 of the 3x4 cards from THE654 Blush Quarters in half to create layers that extended both sides of my photo stack and then glued them to my photos.
And then I trimmed a section of Blush Quarters that I had decided not to use the cards from and glued it along the bottom.
This is how my stack looks from the back, so you can see how I trimmed out the middle of my matts and cut the cards.


This square photo is popped up with 4 layers of cardstock scraps to give it some lift.

This 3x4 card was perfect for representing the bubbly fun my granddaughter was having.

I also cut up a doily to poke in around my layout to add some lacey texture.

And I stamped my white cardstock with a bubble stamp from my stash in Distress Ink Vintage Violet.

Here you can see the other 3x4 card that I chose for this layout.  I felt this card also added to the bubbly fun of the page.

For these big gorgeous florals I put layers of cardstock scraps behind them, the main one has 4 layers and the on near the page edge has 2 layers.
I then used some Helmar Liquid Scrap Dots on the smaller parts to give them lift to.


I added some leaves from the Botanicals paper to the bottom right corner to sort of pull the florals into the corner and added some of them throughout the main section of the layout.

For my title I decided to use this Sweet chipboard from Memorymaze combined with the Bubbles that I had die cut from a pink card from Francheville Cards & Envelopes in Pastel.
I base coated it with Gesso and then coloured it with Distress Ink in Vintage Violet.


I love how this project turned out.  The floral colours in THE Blush Floral were perfect for these photos of my Granddaughter as they matches her dress so well.
Now to scrap my next layout with this little kit I have put together.

Sunday, 8 September 2019

4 Farewell Cards

My husband and I were attending a party for 4 of his colleagues who were leaving after many years at his workplace, 3 of them I had worked with when I worked there 15 years ago.  Hubby wanted to give them a card each with a personal message from himself so I decided to make a set of 4 cards for him.

I had no idea what I was going to do so I started by designing a cut file for the word Farewell to use on my cards and cutting it from white cardstock 4 times.
You can download a copy of my cut file here.  Please if sharing the file or a project using the file link back to this post rather than just giving someone a copy of it.

I grabbed out 4 white card bases and initially I grabbed out a assortment of scraps, flowers, ribbons, lace and die cuts but the variety was making things harder than it had to be so instead I got out my December 2018 kit from Scrapping Fun Kits that was a pink with hints of black and white kit, having everything coordinating really helped get these cards done quickly.  I added some white flowers and a scrap of cream paper to this and set to work.

I cut my papers too size and then just built each card individually, first adding a piece of ribbon or lace and then adhering my die cut onto these with Helmar Acid Free Glue.

Once my word was down I added my flowers with Helmar Premium Craft Glue.

Once the card fronts were dry I adhered them to my card bases with Helmar Acid Free Glue.

I love how they turned out and they were so quick and simple to make once I reduced down my options so I wasn't overwhelmed with choice while creating.

Monday, 2 September 2019

Aunty - Helmar Creative Team

I had a beautiful photo of my daughter with my granddaughter has been needing to be scrapped for some time now so I decided to create a Aunt themed kit for myself start with grabbing out the chipboard alphas I used on my 3 2 1 Crawl layout and sorted through them to see if I could make the word Aunty, as I was out of A's I used a V upside down as my A. 
I then pulled together papers, paper scraps and embellishments that coordinated with the colours I was using from the alphas but keeping it mostly pink as they are both wearing pink in the photo.
My papers were a old Dear Lizzy paper called Serendiity, papers from Pink Paislee Summer Lights 6x6 paper pad, Dear Lizzy Happy Place 6x6 paper pad and papers from the June 2018 and December 2018 kits from Scrapping Fun Kits.
My flowers came from the June 2018 and December 2018 kit from Scrapping Fun Kits, left over flowers from my Happy Days Diner layouts and a few from a destash bundle I bought that I think are from D-lish Scraps.  I also grabbed out a cool metal flower I got at a destash market, some chipboard butterflies, a chipboard bird and a cute arrow from Charm's Creations.

The first thing I had to do was fix these cute concertina flowers that had lost their centres so I grabbed out my Helmar 450 Quick Dry and some metal buttons from my button stash and put new centres on them so they were ready to use.
Now it was time to play with my papers. I salvaged what I could from where papers would be behind other layers so I would have scraps for elsewhere and adhered all my layers together with Helmar Acid Free Glue.
Here is how my layers look from behind and look how much paper I saved, I will wind up using a few bits from this elsewhere on the layout.
I adhered my layers down to some white cardstock with Helmar Acid Free Glue and started playing with my embellishments to work out a embellishment cluster.


Once I had my cluster worked out I started adhering things down with Helmar 450 Quick Dry Adhesive, this was perfect for the variety of embellishments I had including a big chunky metal flower charm, Charms Creations arrow and various paper flowers.
I decided to use Helmar Liquid Scrap Dots to adhere my little tag that said Smile and to fussy cut out some cameras from the camera scrap paper, Helmar Liquid Scrap Dots were perfect for the cameras going into my big cluster as they needed that bit of lift to help them pop.


To adhere my alphas and a cute little heart from the set which I attache to the Smile tag I used Helmar Acid Free Glue.

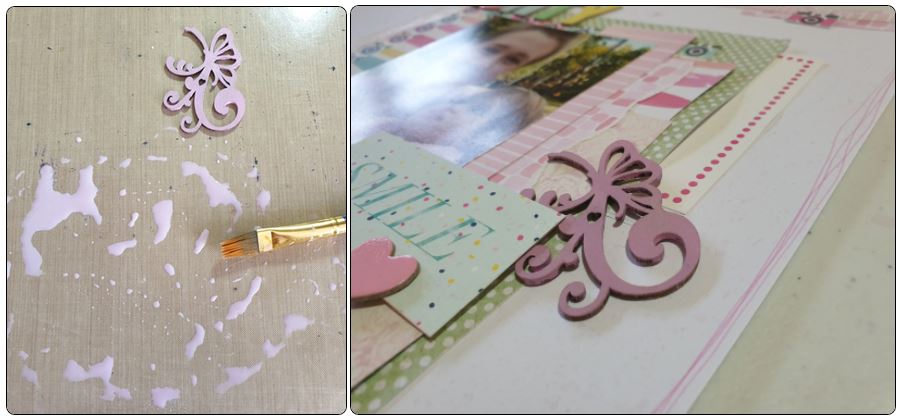
I decided to add this cute chipboard butterfly to my layout.  After I painted it with some Vicki Boutin pink paint I added water to the paint and splattered it around my layout.
For my top and bottom corner I cut some strips from my scrap papers and adhered them down with Helmar Acid Free Glue and then added one of my fussy cut cameras to each of these corners.


I finished off with a doodley border with a old pink pen, added the You Make Me Happy card which I trimmed to fit and tucked in some paper scraps and scraps from trimming the You Make Me Happy card to create more layers.

I am really happy with how this layout turned out.
And look how many alphas I still have left.  I posted a pic on my Intagram and Facebook page and asked what words people could make from these.  What words can you make from these?