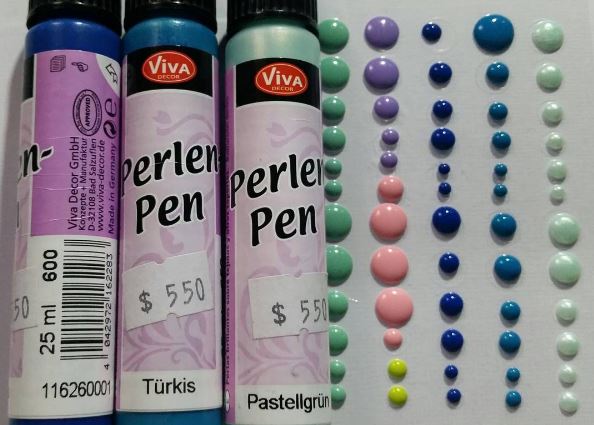
 I decided Day 1 I would make some DIY enamel dots to use in my embellishment clusters later in the project.
I only have 3 colours of Viva Perler Pens so for Day 1 I have made a row of each colour. I used a sheet of purchased dots and moved the left overs to the 2 left hand rows so I could use the 3 rows on the right for my DIY enamel dots and be easily able to store them on the sheet.
I will be sharing my daily progress on my Instagram and I will do a approximate weekly blog post with more details on my progress and creations.
Are you participating in the 100 Days Project this year?
Please share your link to your project with me.
What a fabulous idea. Thanks for sharing this... I want to start making my own embellishments too. Not only because we really struggle to get stuff here in South Africa but when we do it is so expensive. There are awesome video tutorials on making them too. Love this :D
ReplyDeleteThank you Valerie.
DeleteMaking your own embellishments is a lot of fun :)
I have tried the melted bead version and didn't care for those. Your's look fantastic, I will have to give it a try. Thanks for sharing your post with us at Creatively Crafty #CCBG http://tryit-likeit.com/link-party-it
ReplyDeleteThank you, this is my favourite method as it is much safer.
DeleteThis method seems so easy! It's so cool you can make your own embellishments like this.
ReplyDeleteIt is, you do have to leave them overnight to dry so need a space where they won't be touched.
DeleteYou can do this with any brand pearler pen or Ranger Enamel Accents.